We love decorating for Fall! There’s something so exciting about the changing of the seasons - from craft shows, to sweater weather, to pumpkin spice lattes - we love fall, y’all!

It might seem a little strange to be incorporating dried oranges into our decor - typically oranges are used in Christmas decor -- in fact, all of our inspiration images for dried orange decor are winter or Christmas specific! Our friends in Australia especially love a dried orange decor piece in December! But hear us out! We couldn’t help but think they just looked so beautiful with all of our browns, reds and oranges of the fall season. Better yet, oranges are so readily available in North America it’s not even something you need to wait for!

If you’ve never tried drying fruit, it really couldn’t be easier! You don’t need a fancy dehydrator, or even any special tools! You need an oven, a sharp knife and a bit of time ;) Okay, maybe 4 hours…

Supplied Needed:
- 2 or 3 oranges
- Cutting Board & Sharp Knife
- Paper Towel
- Parchment Paper
- Cookie Sheet
- Oven
Step by Step Instructions:
- Start by preheating your oven to either it’s lowest temperature OR 200°F degrees. Lower temperatures will allow the fruit to dry out slowly and evenly, helping them retain their even coloring. If your oven is too hot, it will begin to cook the oranges before they are completely dried out.
- Taking a sharp knife (to avoid squishing the oranges out of shape) cut slices ⅛” to ¼” thick. The thicker the slice the longer it will take in the oven, so we opted for ⅛”.
- Take a paper towel and make sure to wipe off and soak up any juices on the slices. If you leave the juices they will caramelize quicker than the fruit can dry, and your slices will become much darker.
- Line your cookie tray with parchment paper, and lay out your slices flat on the tray.
- Pop them in the oven and let them dry! Your dry time will depend on how hot your oven is, and how thick you cut your slices. Check on them often, flipping and rotating as you check them. Ours took about 3 hours to finish.
- If your slices are still wet to the touch they aren’t done! They should be crisp on the edges, and the fruit should be mostly dry.
Now that you’ve got yourself some dried orange slices, you can start planning your crafting! We decided to do three things with our oranges!
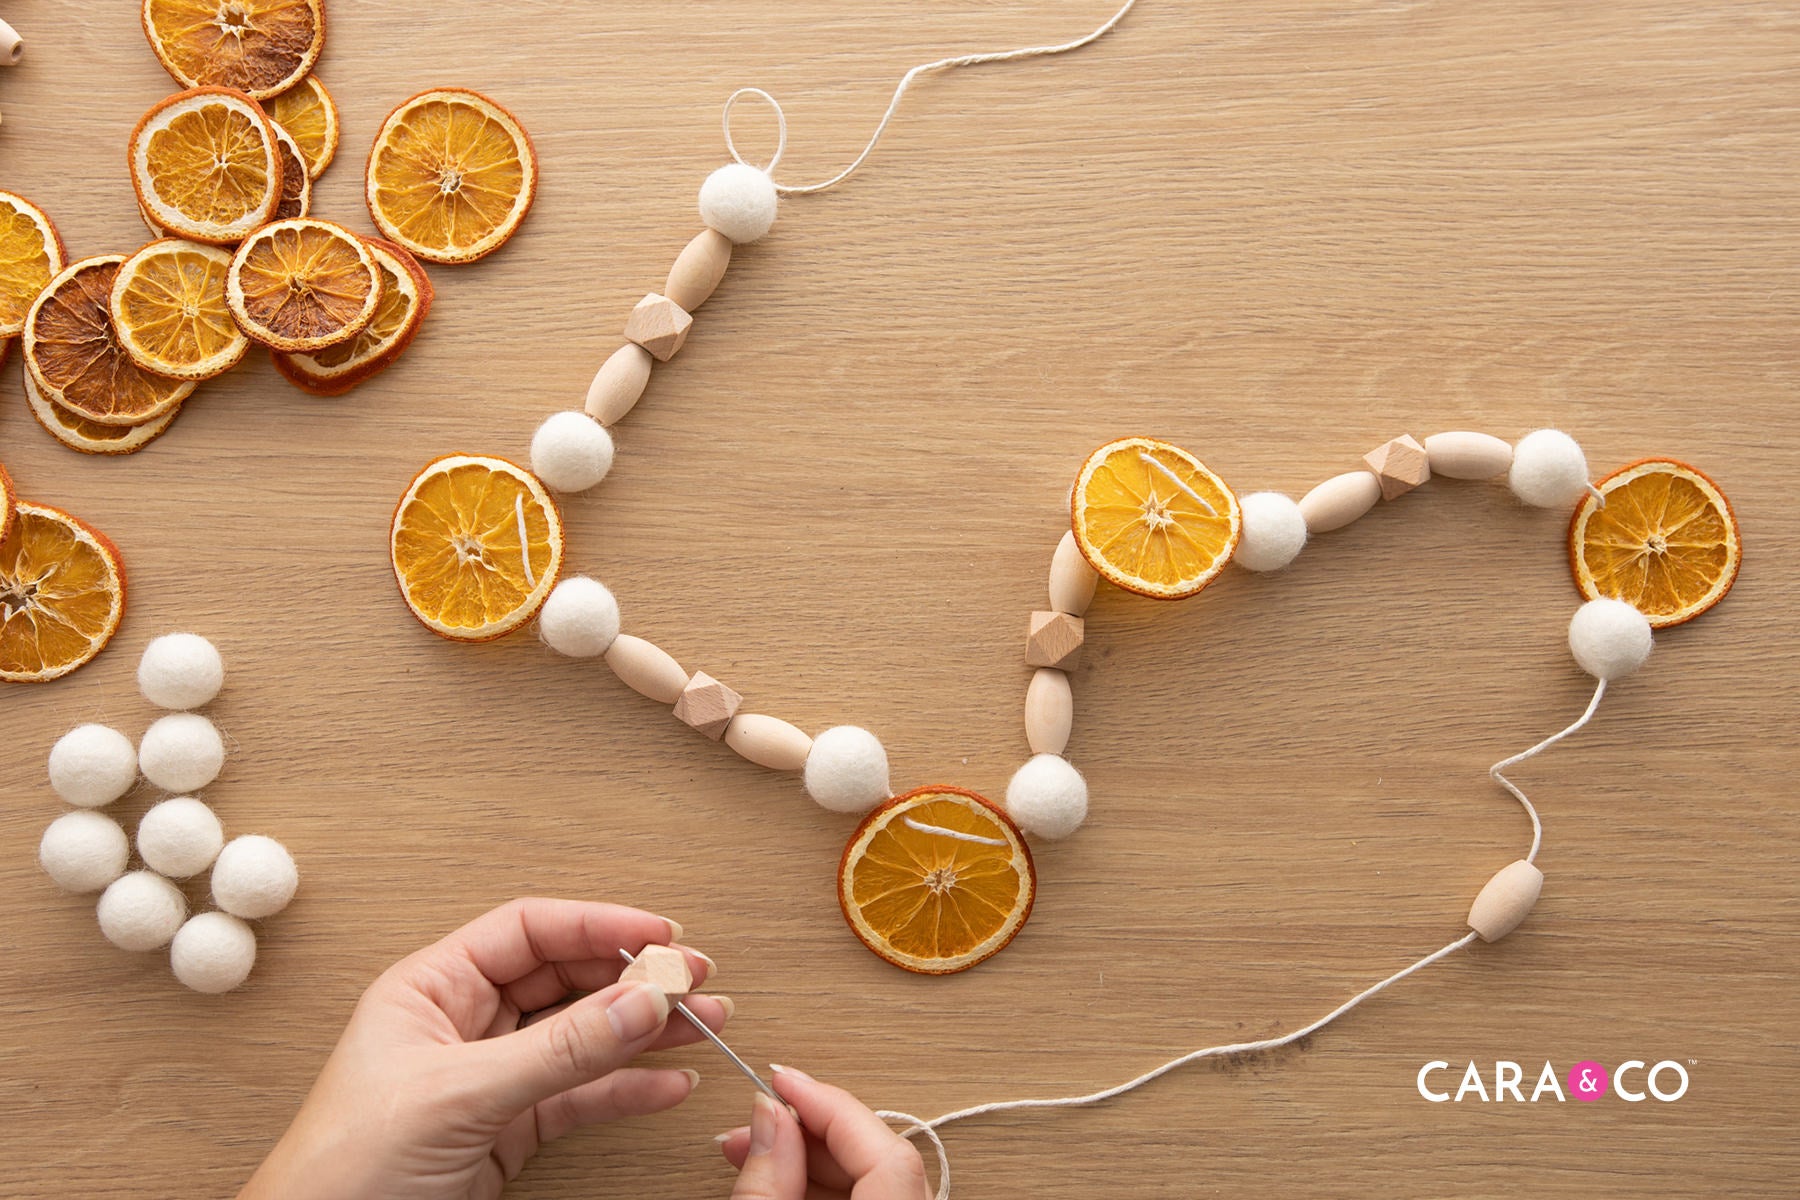
CRAFT 1: Dried Orange Garland

Add a bit of sun to your fall garland! We’ve included these beautiful orange slices to a fun wood and felt ball garland!


If you’re looking for your garland to double as a beautiful scent in your room, you can always drop a couple of your favorite essential oils on the wood beads or felt balls!

CRAFT 2: Dried Orange Fall Wreath

No one loves a seasonal wreath more than we do, and we love playing around with interesting textures and additions to our wreaths!

This time we’ve done a super easy faux macrame braid on our 12” wreath hoop. All you need to do is measure out about 6 lengths of 3 foot long macrame cord. Hot glue your first three strands directly onto your wreath hoop, and the other three facing the opposite direction right beside.

Taking turns, twist each 3 string section into a semi circle, being careful not to twist the cording. Glue each section down as it crosses the wreath hoop.


We added some faux fall foliage first (say that three times!) and next, layered in our oranges and some adorable bundles of cinnamon sticks. They smell amazing and give the most beautiful rustic look to our wreath!


CRAFT 3: Dried Orange Window Hanging

If you love popping your windows open for some fresh air, you’ll love this little potpourri-looking hanging! Take some of your smaller end pieces of orange and use them as a cute centrepiece to a window hanging!
There’s a couple steps but it’s such a cute quick craft!
Supplies Needed:
- Dried Orange Slices
- 3” Wood Maple Ring
- Macrame Cording
- Cotton Twine
- Scissors & Craft Needle
Step by Step Instructions:
1. Take a 3-4 foot length of Cotton Twine. Make a small loop and feed it through the Maple Wood round hole.
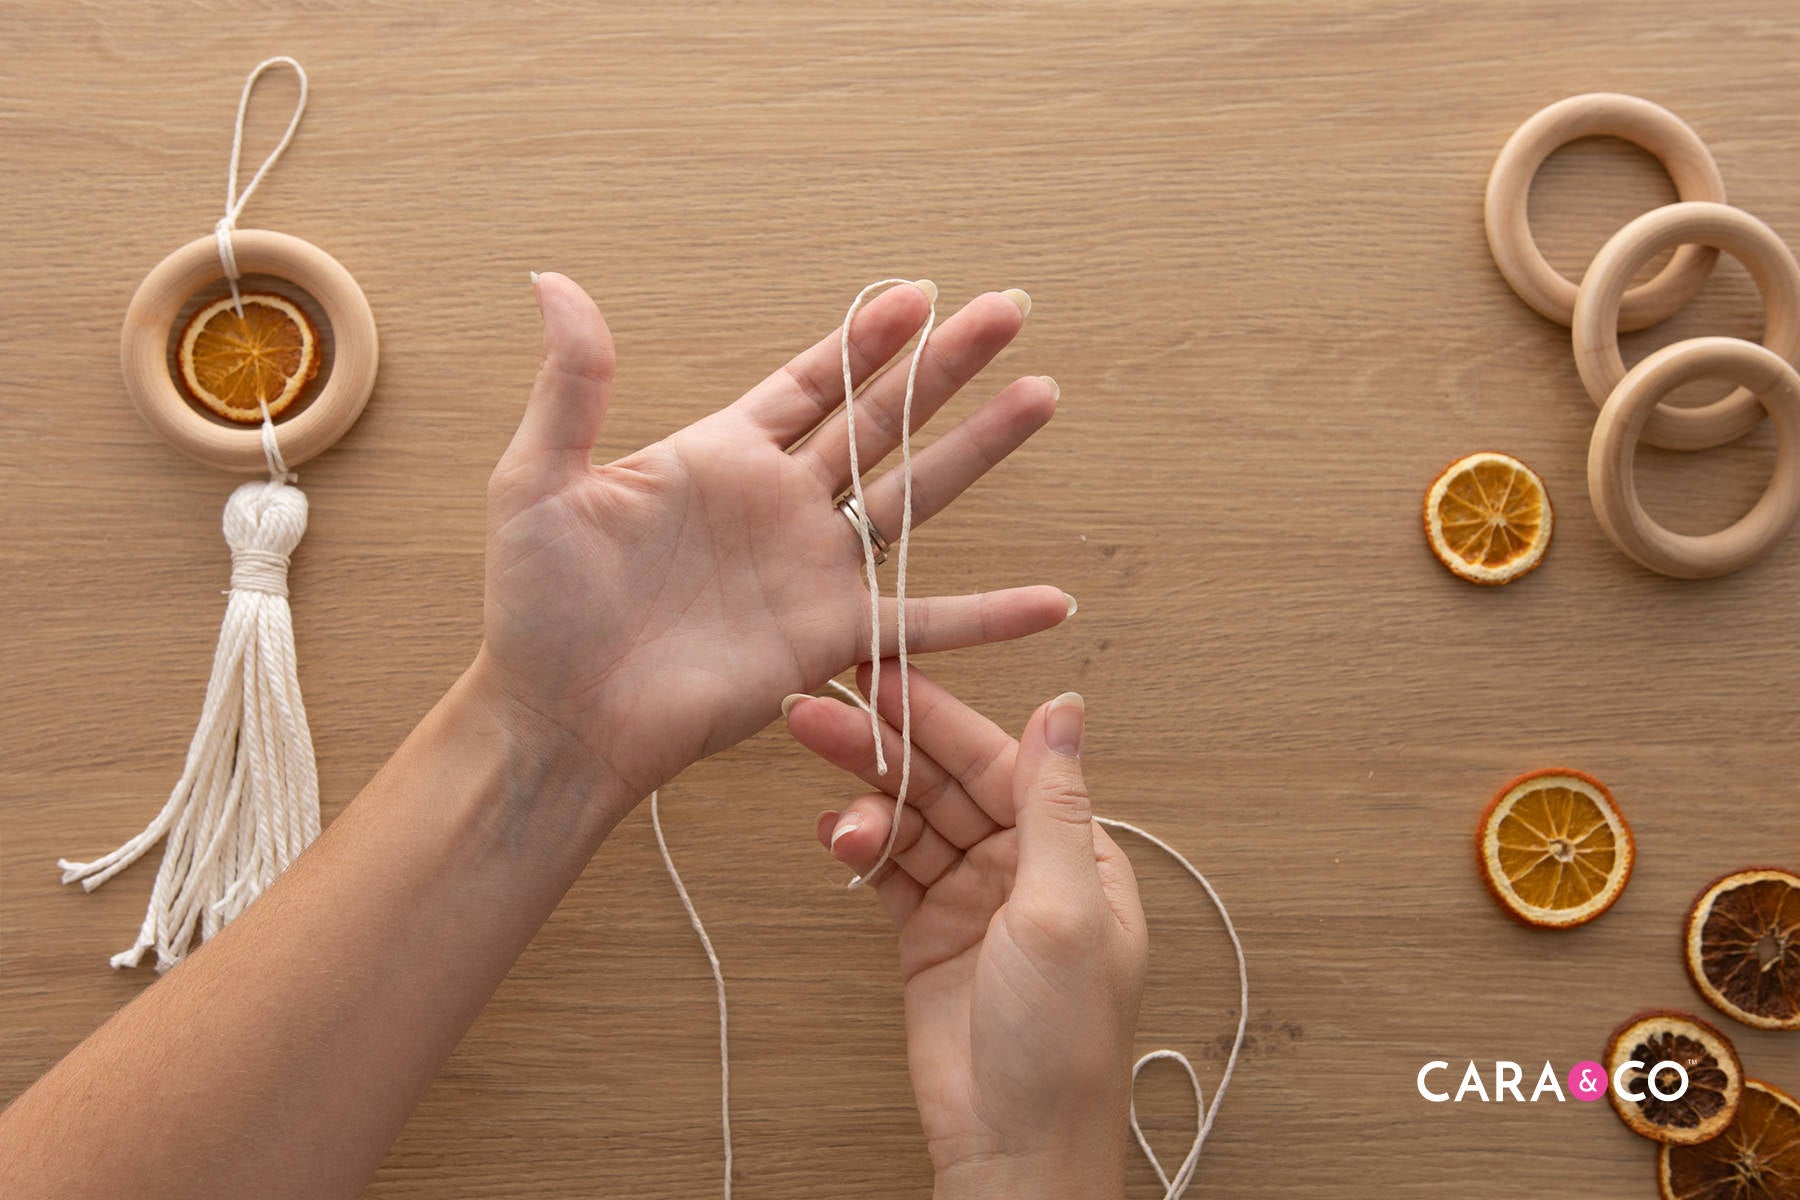
2. Take the loop and tie it twice around the wood round, leaving a loop for hanging. Trim the short end.


3. Thread your needle on your long end of twine and thread on your single orange slice, making sure to keep your holes as close to the rind as possible.


4. Slide your orange slice up into the Maple Round, and loop the string on the bottom of the ring.

5. Set aside your wood ring and needle. Take your macrame cording and a postcard and make your tassel. You can do this by wrapping cording around your postcard until you have a bundle you’re happy with the thickness of.
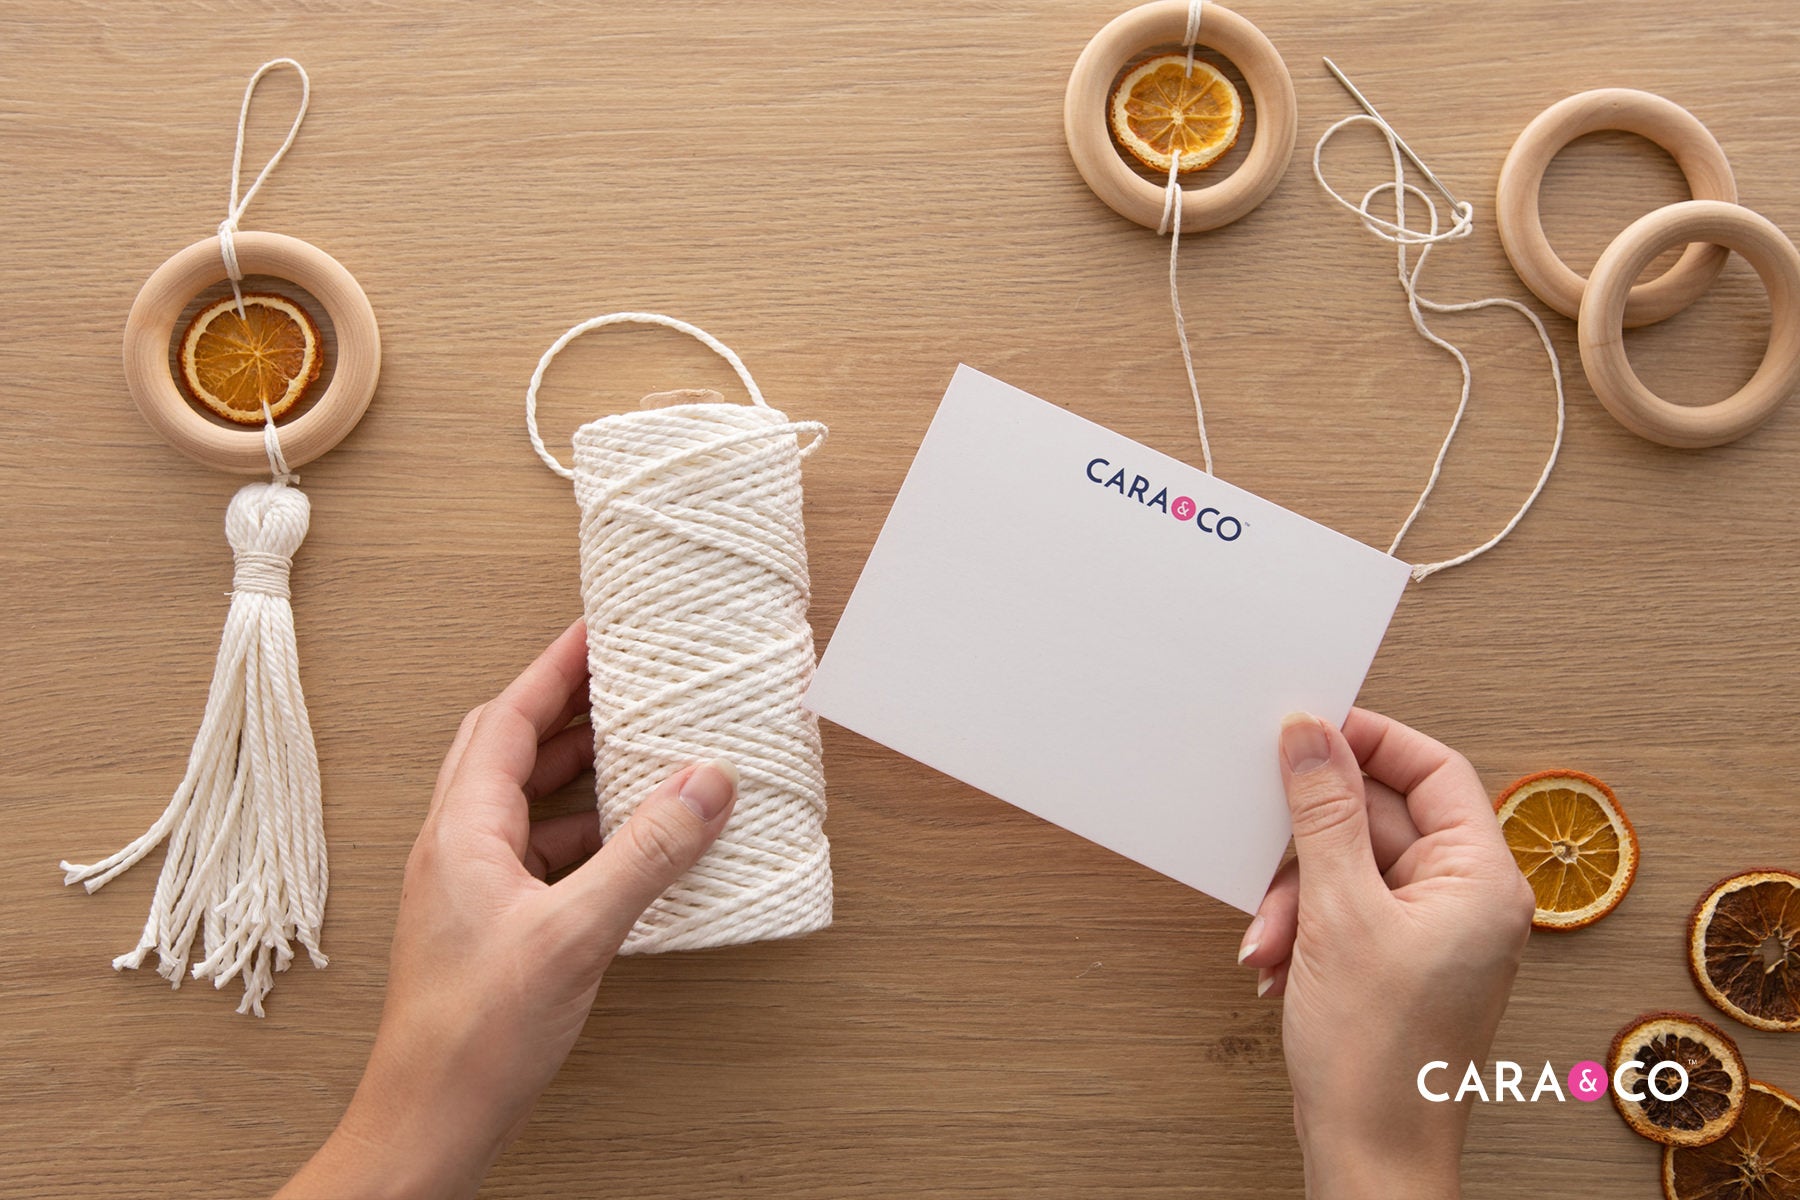

6. Take a smaller piece of cord, and tie a double knot at one end. Slide the cording loops off the card and cut the loops at the opposite side that you’ve tied.


7. Flip your loop inside out so that the tied knot is inside the tassel.


8. Take a 1-2 foot length of twine and create a loop knot to tie off your tassel. Do this by making a small loop pointing downwards with a short end left at the top. Wrap your twine around the entire tassel AND the loop you created until you’ve either got the thickness you prefer, or until you’ve almost covered your loop up.


9. Thread your twine through the bottom loop and hold it secure. Pull upwards on the short end at the top of the tassel to close the knot. Pull the top string until the knot is hidden inside the wrapped portion and no longer visible. Trim your ends.


10. Now that you have a tassel, pick up your twine and needle again. Thread your needle through the top loop of your twine (where you tied off the strings) and loop it back over the Maple Round. Tie off the string, and voila! Hanging complete! We had a small suction cup hook that we hung ours up with, but depending on the type of windows you have you could probably also use the window pane tabs as well!


Dried Orange Slices don’t just have to be for Christmas and we love the warm vibe they give to our decor pieces! Perfect for a weekend project, we would love to see if you make any crafts with dried oranges! Make sure you tag us on social media using the hashtag #createdwithcarasupply
Happy Crafting!
xo
-the girls